I'm not an avid photographer, but have still managed to accumulate over 2800 35mm slides before I bought my first digital camera in September 2003. These have been sitting in a couple of shoe boxes, slowly decaying, for up to 30 years. A few weeks ago I decided to bite the bullet and transfer them to modern, indestructible, digital form.
A bit of web searching suggested there are three classes of film scanners on the market: cheap & nasty, twice the price but OK, and 30 times the price & out of my league. I soon decided against the cheap & nasty category. If I'm going to spend many hours scanning all my slides, I'd rather not have to do it twice.
The mid range in scanners appears to be dominated by plustek's OpticFilm series. After comparing the different models, I chose the OpticFilm 7300 model as it has slightly better dynamic range and is faster than the base models, and I feel I can do without the infra red dust detection of the more expensive models.
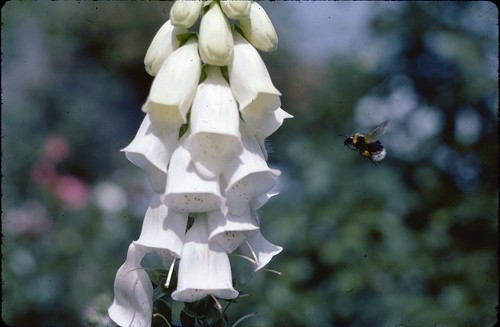
Since buying the scanner I've scanned just over 500 of my slides, starting with the very first picture I took with my Zenith E - a big, clunky, Russian made SLR I bought in 1978. I'd previously catalogued all my slides, giving each one a 4 digit number, so scanning them in order seems the most sensible way to proceed. The picture above is slide 0038, taken in my parents' garden in 1978.
Now would seem to be a good time to record some of my experiences with the slide scanner. Overall I'm quite impressed, but there are a few significant annoyances that do impede the process of scanning.
Mechanically the unit is pleasingly solid, and the slide holder grips the slides firmly while being easy to load and unload. However, when sliding the holder into the scanner it is quite difficult to stop in the right place. There are dents in the side of the holder that engage with something spring loaded inside the scanner, but the action is not nearly positive enough. Quite often the prescan shows the slide to be incorrectly positioned and a nudge is needed, followed by a repeat prescan.
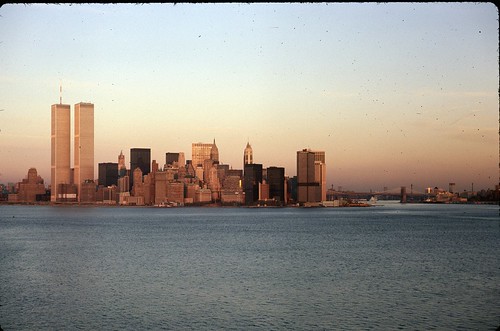
After the prescan, the edge of the image area has to be set. The SilverFast SEplus software supplied with the scanner has an automatic function to do this, but it quite often fails, particularly with under exposed slides or if the image contains strong straight lines near the edge. I do realise that finding the ragged edges of a scanned slide is a non-trivial image processing problem, especially as the prescan image is quite noisy, but I'm surprised at how often it fails. Even when it succeeds, it consistently treats the top and bottom edges of a slide differently, as in the example above.
What really annoys me though is that the software darkens the area outside the image frame, thus hiding any picture area that's missing. This makes manual adjustment a two stage process - drag and drop the boundary line beyond the slide edge (to undarken the image) then drag and drop it to the actual edge. I think the software should lighten the area outside the boundary to make any missed image more visible, not darken it to make it less visible. It's a diagnostic tool, not a slide show application.
After setting the image area, there are numerous controls to adjust the scan brightness, contrast, gamma, colour balance and so on. These are much more powerful than I need, but may be useful if I rescan a chosen few slides that merit extra care. These slides would probably also get the noise-reducing, time-consuming, multi-scan treatment as well. For now, I just use the auto-adjust function, occasionally choosing a different "image type" such as "evening" if it gives a better looking result.
One curiosity about the software is the choice of positive, negative, or Kodachrome film types. All the slides I've scanned so far have been Kodachrome or Ektachrome, and the Kodachrome setting has given a better colour balance than the positive setting. I haven't attempted to scan any negatives.
Having already catalogued my slides in a database application, I decided to reuse this data to label the slides. After some hours experimenting with different Python libraries to process EXIF and IPTC data I finished up with a script that seems to do the job. If you follow the link to flickr from one of the above pictures you'll see the description and tags that were automatically extracted by flickr from the image's EXIF and IPTC data.