Friday 21 October 2016

Making a canopy for my Wilesco traction engine, part 2.

In a previous post I described the preliminary stages of making a canopy for my Wilesco toy traction engine. In this post I commit my design to metal.

Replacement canopy for Wilesco traction engine

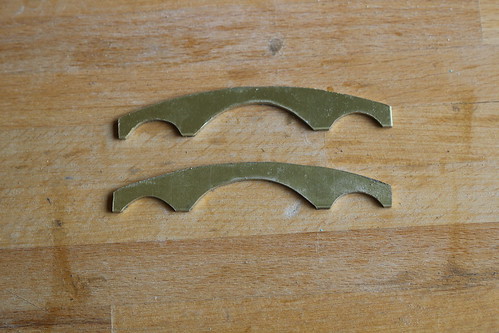
I cut the cross members from 1.5mm thick brass sheet. This was the first time I'd used a piercing saw (also known as a jeweller's saw) since my 'O' level metalwork practical exam 41 years ago. At least I didn't saw into my finger this time.

Replacement canopy for Wilesco traction engine

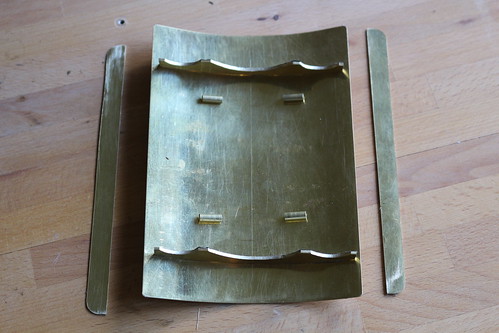
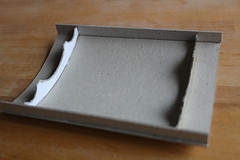
The top and sides are cut from 0.55mm brass. I bent the top around a suitable diameter plastic pipe, gradually bending it a bit further until it matched the curve of the cross members. The four short pieces of 4mm brass tube will receive the vertical supports.

Replacement canopy for Wilesco traction engine

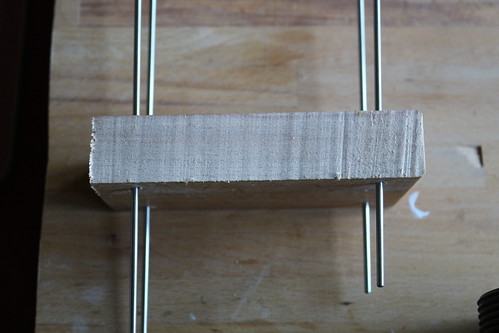
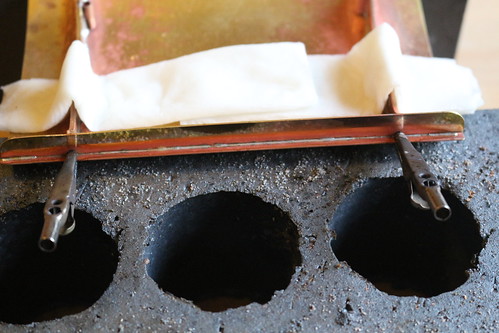
The previously assembled jig was used with four lengths of 3mm stainless steel rod to hold the brass tubes in place while each cross member was soldered.

Replacement canopy for Wilesco traction engine

Unfortunately one of the pieces of stainless steel got soldered in place, even though I was using flux that clearly says "not for use on stainless steel". I couldn't wrench it out without ripping off the brass tube, so I had to cut a new piece of tube and resolder that corner.

Replacement canopy for Wilesco traction engine

I used wet kitchen towel to prevent the cross members becoming unsoldered while I soldered the sides. I hadn't realised in advance that heating just one side of the roof would cause it to distort, so the ends of the sides are slightly separated from the top. I probably should have glued the side pieces on instead of soldering them.

Replacement canopy for Wilesco traction engine

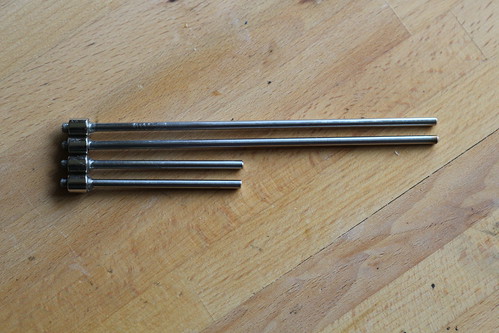
The supports are made from 3mm stainless steel rod. After cutting them to length I glued a cylindrical magnet to each one. The magnets are ¼ inch diameter with an ⅛ inch hole.

Replacement canopy for Wilesco traction engine

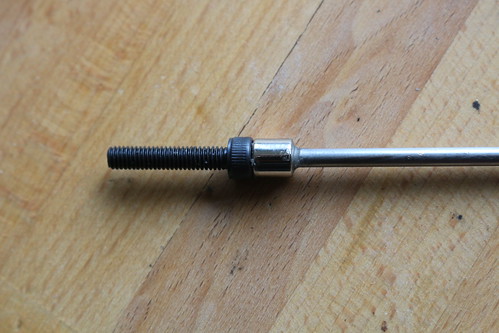
The magnets are positioned so the protruding bit of 3mm rod snugly fits the cap of an M4 socket head screw. I used a screw to hold each magnet in place while the glue set, but was careful to remove the screw before the glue had fully hardened. Some glue had worked its way into the screw cap.

Replacement canopy for Wilesco traction engine

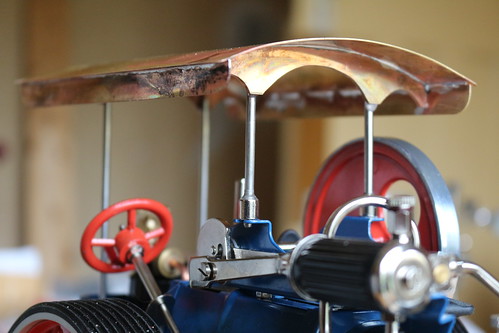
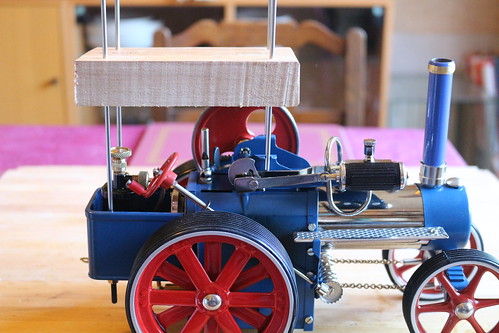
With the magnets in place I was able to fine tune the length of each support so the canopy was level and evenly supported. The front supports attach directly to the traction engine "machine plate" while the rear supports attach to M4 x 20mm socket head screws in the original canopy's mounting holes in the scuttle. (I probably should have used longer screws, bringing the heads nearer the top of the scuttle.) Once I was satisfied with the support lengths I glued them into the brass tubes.

All that's left to do is to remove excess solder and glue, then cleaning and painting.

Monday 10 October 2016

It's a toy, not a model!

Since I bought a toy traction engine I've been thinking about all sorts of ways to improve it. I've already started scratch building a better canopy and have nearly finished making a simple trailer from a kit. In all of this it's important to remember that it's a tin-plate toy, not a scale model. Excessive detail would look out of place.

Wilesco toy traction engine kit

I can't help asking myself what sort of traction engine it's not a scale model of though. Comparing its proportions (mainly wheelbase and wheel sizes) with some of the many traction engine photos to be found on the web I reckon the best match is a Garrett steam tractor, at about 1:18 scale. Nothing else I've seen has the chimney similarly to the rear of the smoke box.


In the UK a "steam tractor" was a small traction engine (no more than 5 tons weight) that could legally be operated by just one person. They were used for light haulage, particularly timber, so Wilesco's toy log wagon is an appropriate accessory.

The most obviously wrong bit of the Wilesco toy is the flywheel. Apart from having two holes it's also much too large. I assume this is required for the engine to run properly. I've also not seen anything like the Wilesco's drip tray / gangway on a real steam tractor class engine. The most obvious omission is a belly tank, but I have plans to rectify that eventually.

The next question is what to tow? Whilst I fancy the challenge of building a heavy haulage trailer this just isn't the right sort of engine to tow it. Period photos from the 1910s and 1920s when such engines were common are not easy to find, but a typical load was nothing more than one or two 4 wheeled wagons.


This picture shows a Garrett tractor being used for timber haulage, possibly in the 1920s.


This picture shows a Taskers tractor hauling two precarious looking trailers. The high load platform and rather spindly look of these reminds me of the Mamod toy wagons which I'd previously thought were rather unrealistic.

Thursday 6 October 2016

Making a canopy for my Wilesco traction engine, part 1.

One of the less realistic parts of the Wilesco D415 (kit version of the D405) traction engine is its canopy. It's too long, too high, and in my case doesn't fit very well (although the fit could be improved with a bit of tweaking).

This post describes the preliminary stages of making a replacement canopy. In part 2 I commit the design to metal.

Wilesco toy traction engine kit

After looking online at lots of traction engine pictures I decided my toy would look better with something like this.

Boadicea

I started by prototyping the canopy itself in cardboard. I drew suitably shaped cross members with the venerable xfig drawing program, printed them out, stuck them to some thick card and cut them out with a Stanley knife. After gluing on the top and sides I had a rough idea of what my design might eventually look like. This also allowed me to estimate how much shorter the new (straight) support struts need to be.

Replacement canopy for Wilesco traction engine Replacement canopy for Wilesco traction engine

Before cutting and soldering sheet brass to make the canopy I needed to make a jig to hold the support struts in place. I used a bit of kitchen worktop offcut (solid beech, 28mm thick) and drilled 3mm holes for the stainless steel supports. According to my measurements the rear supports are 46mm apart, the front ones are 49mm apart, and there's 103mm between them. Making the jig allowed me to verify these measurements.

Replacement canopy for Wilesco traction engine

Unfortunately my cheap drill stand is not very consistent and the holes aren't exactly parallel. I won't tell you how many earlier attempts were discarded.

Replacement canopy for Wilesco traction engine