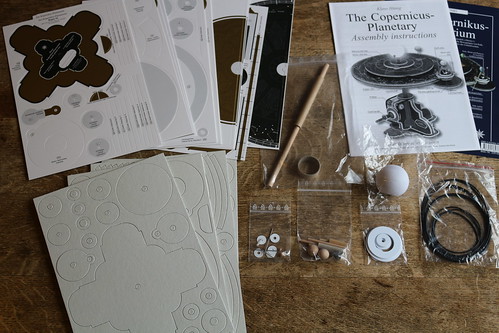
For a long time I've fancied having an Orrery but have been put off by the high price of traditional style brass ones with all the planets (and Pluto). Something much more my style is the cardboard kit from AstroMedia. This only has the inner planets, but I get the fun of building it.
I bought the kit a few months ago from Sherwoods Photographic Ltd, a company I've bought a telescope and accessories from in the past. Two weeks ago I finally got round to starting to construct it.
I soon discovered that one of the die-cut thick card sheets was missing (and I had a duplicate of another sheet). I emailed Sherwoods and they arranged for the UK arm of AstroMedia to send me a replacement, which arrived the next day. Top notch service from both companies.
At the time of writing I'm about halfway through building the kit. So far I'm very impressed with its quality, and with the instruction leaflet, although it occasionally reveals its German language origins. Construction is quite slow as you have to allow glue to set before moving on to the next stage. I'm also doing the optional painting of some cardboard edges on partly assembled components, so I have to wait for that paint to dry as well.
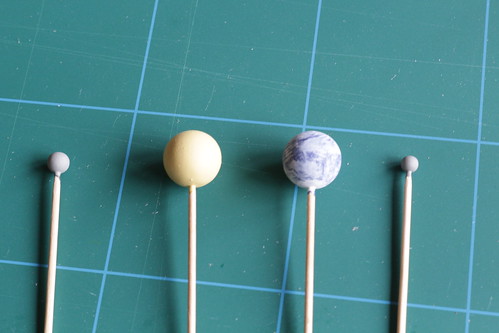
There is a temptation to read ahead and start constructing later parts, but with so many similar looking wheels it could get very confusing. One thing I have done in advance though is to paint the small wooden spheres used to represent the planets and our moon, after temporarily mounting them on cocktail sticks.
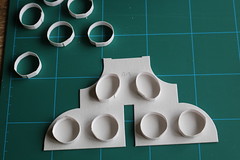
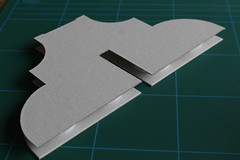
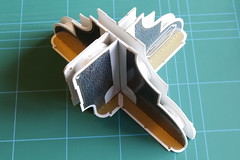
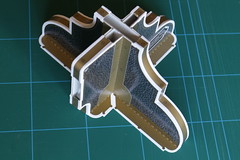
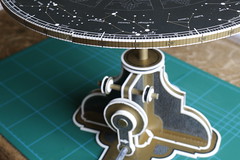
The first component to be built is the pedestal. This uses spacer rings between two sheets of card to make a strong, light structure. Strips of printed paper are used to cover the gap — a fiddly bit of glueing but the result isn't too bad.
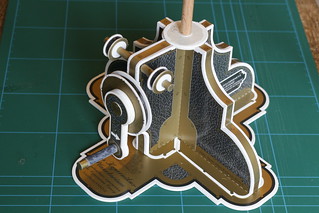
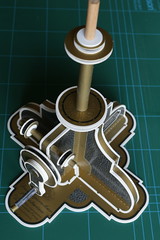
Next is the drive crank and pulleys, followed by the pedestal base and the central shaft with three pulleys.
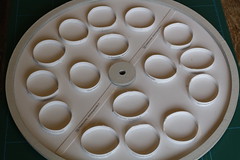
Today I finished the ecliptic disc, another structure using spacing rings. It's beginning to look like something now.
PS Part two is now available. More pictures of its construction are available on Flickr.
2 comments:
Hi, I stumbled across this as I have this kit on order and I'm doing a little prior research. Can I ask what glue you used to avoid paper wrinkling? Any other tips? Thanks
I used something called "white glue" made by Bostik. Smearing it thinly over the whole surface seems to avoid problems.
Post a Comment