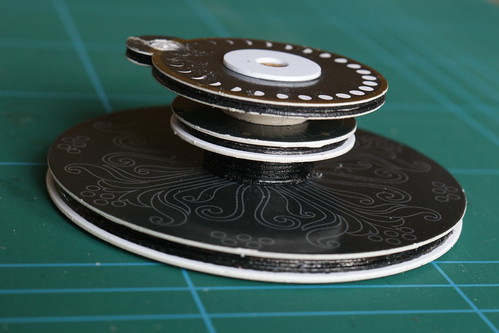
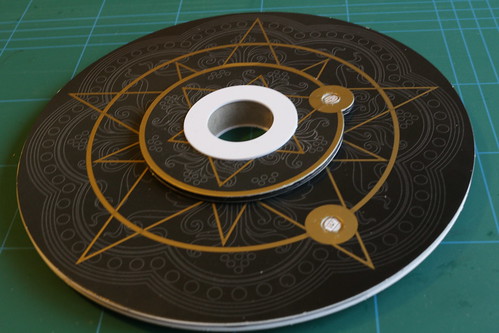
The first part to be constructed is the "planetary gearing". This will eventually roll around the ecliptic disc, held in place by drive bands above and below the ecliptic disc.
As you know, Earth's rotational axis is tilted and the Orrery has quite a clever system to keep the axis pointing in (roughly) the same direction as the Earth orbits the sun. The Earth rotates on a steel shaft which runs through a brass tube attached to a small bracket. The bracket is attached to a hollow shaft that passes through the planetary gearing to a drive wheel below.
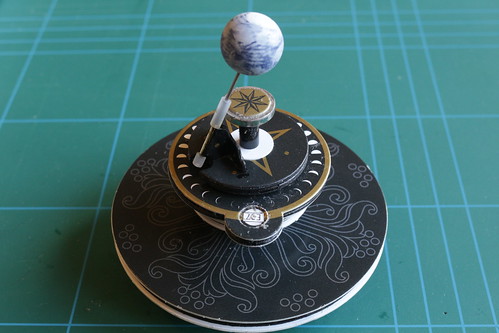
The Earth's rotation is driven by another pulley and shaft that passes through the planetary gearing. A round magnet attached to the top drives the Earth's rotation via a small piece of silicone tubing. Unfortunately I didn't get the magnet exactly centred on the shaft and so the drive occasionally slips.
Above the ecliptic disc are two large discs supporting Mercury and Venus. The orbit of Venus is driven by a belt around its large support disc, and Mercury is driven from below by a hollow shaft through the Venus disc. After fitting all the drive belts the moon and remaining planets are attached with steel support pins.
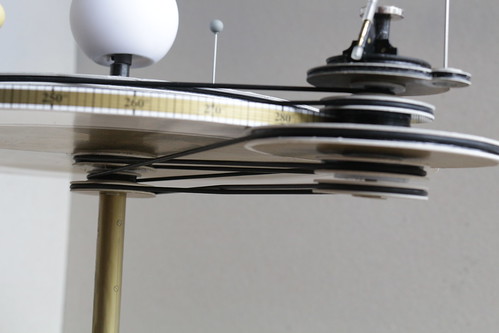
There are five drive belts holding the planetary gearing in place. The topmost one drives the orbit of Venus, the next drives Mercury's orbit. The bottommost one drives Earth's rotation, the next keeps Earth's axis pointing in a constant direction and the last drives the planetary gearing to roll around the ecliptic disc. Does it all work? Watch the video and see for yourself.
PS More pictures of its construction are available on Flickr.
2 comments:
Got this for Christmas and am finding it difficult to put together. I addition some bits are at all clear on the construction ie the crank. It didn’t make sense how the crank was secured to the base. 8 found another website from a young guy who has a website called http://michelswunderland.de/solderiron/tellurium.html. It was only when I saw what this young lad had done that it made a bit more sense. He is a bit critical about the 30 hrs to complete. He says more like 70 hrs. I was looking for the eagle moss version but they seem to be phasing this out.
I didn't count how many hours it took me, but there's no doubt it's not a simple kit. I found the instructions to be good enough, but I am an engineer.
Post a Comment