Thursday, 23 June 2022

Hungarian sour cherry soup revisited

Sour cherry soup

Five years ago I wrote about my first attempt to make Hungarian sour cherry soup. My recipe has evolved a little since then, so I thought it might be useful to record the current version.

  • 400g Morello cherries
  • 2 cloves
  • ~1cm cinnamon stick
  • 100ml red wine
  • 200-300ml water
  • 25g (or 30 ml) sugar
  • 5 ml flour
  • 100ml crème fraîche
  1. Stone the cherries, then simmer the stones in a little water for 10 minutes.
  2. Place the cherries in a saucepan with the cloves and cinnamon. Add the water from the stones, red wine and water to cover. Bring to the boil and simmer for 20 minutes.
  3. Blend the flour and crème fraîche in a small bowl.
  4. Work the cherries through a sieve, removing the cloves and cinnamon. Stir in the sugar. Whisk until smooth.
  5. Mix some of the cherries into the cream and flour to loosen it before mixing back into the soup. Whisk until smooth and free of lumps of cream. Return to the boil then simmer very gently for five minutes to thicken slightly.
  6. Stand the pan in cold water to cool the soup, then finish cooling in the fridge.
Serves 2.

Saturday, 4 December 2021

Why have I got a web site?

You might already know that I have my own web site http://www.jim-easterbrook.me.uk/. It's a modest affair and I don't updated it very often - the last change to the main page was in November 2015.

Recently my web hosting provider withdrew the "lite" package I was using and migrated me to another package, at more than four times the price! This has prompted me to ask myself why I have a web site. It started off as somewhere to put various things I wanted to share with other people. Some photographs, some articles on hobbies, e.g. various upgrades I'd made to my astronomy gear, and odds and ends that I wanted to publish.

At first I used web space provided by my ISP (internet service provider), but every time I moved to another ISP the web site address would change. This prompted me to get my own domain name (jim-easterbrook.me.uk) giving me a permanent web site and email address. Having my own email address is very useful (apart from the people who don't recognise ".me.uk" and insist on changing it when they write it down) but how useful is it to have my own web site? Does anyone ever look at it?

I'm increasingly using other web sites for specific areas of interest. All my open source software projects are on GitHub - it's an obvious place for anyone looking for open source software to find them. (I'd previously used Google Code, but Google killed that after a few years.) I put photographs on flickr - it's a well known photo sharing site so maybe that's where people will go to find photographs. (I used to use Google Picasa, but Google killed that after a few years.) Flickr is getting more expensive, and its quality of service is declining, so I don't know how long I'll carry on using it.

My blog is here, on "Blogger" - who knows how long it will be before Google kills this site as well? Should I add a blog to my own web site? Blogger is free, but that means I'm not the customer, I'm the product.

One final complication is that I also maintain a web site for my partner, who is a singer and singing teacher. She doesn't get much business through the web site, but would it be a problem if I got rid of it? (It's hosted as part of the same package as my site.)

So many questions, so few answers.

Friday, 27 November 2020

A simple model railway DCC accessory controller

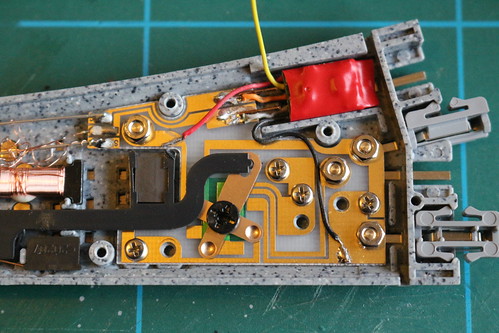
A few months ago I converted my N gauge train set to DCC operation. As well as fitting DCC decoders to my locomotives I also converted the points by fitting a tiny decoder in each one.

DCC operation of Kato #4 points

This makes setting up a temporary layout (I don't yet have any sort of permanent layout) nice and easy (as there's no point wiring to worry about) but operating accessories such as points from the NCE PowerCab controller is a bit of a faff. First you press the "accy" button, then select the number, then "enter", then "on" or "off". Half the time you've misremembered the last state of that point so the command has no effect, so you then have to press the "accy" button twice to toggle it.

NCE controllers can be linked together via a system called "Cab Bus". This uses a fairly simple protocol that allows subsidiary controllers to send commands to the main controller (the PowerCab in my case) which then sends the corresponding DCC commands to the track. I decided to make a simple controller to switch my points, using an Arduino. I've never used an Arduino before and I thought this would be a good starter project. I found this useful page that gave me all the information I needed.

I decided to use an Arduino Nano Every as it's quite small, has a serial interface that's separate from its USB port, and has a switching voltage regulator to allow it to run efficiently from the Cab Bus 12 V supply. The other main components are an RS485 to TTL converter, a pair of RJ11 sockets, and push buttons & LEDs.

Arduino CabBus controller

I used two RJ11 sockets to provide "loop through" to another controller (possibly) or an RS485 to USB interface used to monitor the Cab Bus during development. I wrote a simple Python script to show the polling frequency of each polled address and display any non-polling bytes on the bus.

from collections import defaultdict
import sys
import time

import serial


def main():
    with serial.Serial('/dev/ttyUSB0', baudrate=9600,
                       bytesize=serial.EIGHTBITS, parity=serial.PARITY_NONE,
                       stopbits=serial.STOPBITS_TWO) as bus:
        period = 15.0
        last_byte = None
        while True:
            pings = defaultdict(int)
            stop = time.time() + period
            while time.time() < stop:
                data = ord(bus.read(1))
                if (data & 0b11000000) == 0b10000000:
                    # ping byte
                    if last_byte is None:
                        print()
                    pings[data] += 1
                    last_byte = data
                else:
                    # data byte
                    if last_byte is not None:
                        print('... {:02x}'.format(last_byte), end='')
                        last_byte = None
                    print(' {:02x}'.format(data), end='')
            print()
            for key in sorted(pings.keys()):
                print('{:02x}: {:3.2f} Hz'.format(key, pings[key] / period))
    return 0


if __name__ == '__main__':
    sys.exit(main())

The circuit board uses "strip board" or "Vero board". I spent some time planning it (unusually for me) and finished up with a quite compact arrangement. In this diagram the gold coloured lines are tracks on the back of the board and the blue lines are wires above the board.

The Arduino "sketch" is also quite simple. It uses a struct to store the current state of each button. When a button is pressed its LEDs are toggled, and the corresponding accessory command is sent to the cab bus.

// This is a 'type c' controller, so its address should be 8, 9, or 10 when using PowerCab
const int controllerAddress = 8;

// Which serial port is connected to the Cab Bus
#define RS485 Serial1

// Connected to RS485 module's /RE and DE pins
const int txEnablePin = 10;

// Number of push button & LED sets
const int channelCount = 8;

// Configuration of each channel
struct configDetails {
  int buttonPin;  // pin connected to push button
  int ledPin;     // pin connected to "on"/"off" LED pair
  int accyAddr;   // DCC address of the controlled accessory
  bool inverted;  // swap the meanings of "on" and "off"
};
const struct configDetails configuration[channelCount] = {
  {A4, 5,  1, false},
  {A0, 9,  2,  true},
  {A5, 4,  3, false},
  {A1, 8,  4,  true},
  {A6, 3, 60, false},
  {A2, 7, 61, false},
  {A7, 2, 62, false},
  {A3, 6, 63, false},
};

// How many ms to wait for button to settle
const unsigned long DEBOUNCE_DELAY = 10;

struct channelState {
  bool on = false;        // "output" value, toggles each button press
  bool down = false;      // button is currently down
  unsigned long wait = 0; // wait until this time for the button to settle
};
struct channelState stateStore[channelCount];

void setup() {
  const struct configDetails* cnfg;
  for (int channel = 0; channel < channelCount; channel++) {
    cnfg = &configuration[channel];
    pinMode(cnfg->buttonPin, INPUT_PULLUP);
    pinMode(cnfg->ledPin, OUTPUT);
  }
  pinMode(txEnablePin, OUTPUT);
  digitalWrite(txEnablePin, LOW);
  RS485.begin(9600, SERIAL_8N2);
}

void loop() {
  const struct configDetails* cnfg;
  struct channelState* state;
  for (int channel = 0; channel < channelCount; channel++) {
    cnfg = &configuration[channel];
    state = &stateStore[channel];
    if (pollButton(cnfg->buttonPin, state)) {
      digitalWrite(cnfg->ledPin, state->on?HIGH:LOW);
      switchCabBus(cnfg->accyAddr, state->on != cnfg->inverted);
    }
  }
}

bool pollButton(const int pinNo, struct channelState* state) {
  // Return true if button "on"/"off" state has just changed
  if (state->wait != 0) {
    // waiting for stability
    if (millis() < state->wait) {
      return false;
    }
  }
  if (digitalRead(pinNo) == HIGH) {
    // button is up, so any waiting is cancelled
    state->down = false;
    state->wait = 0;
    return false;
  }
  if (state->wait != 0) {
    // button has been pressed for long enough
    state->wait = 0;
    state->on = not state->on;
    return true;
  }
  else if (not state->down) {
    // button has just been pressed
    state->down = true;
    state->wait = millis() + DEBOUNCE_DELAY;
  }
  return false;
}

void switchCabBus(const int accyAddr, const bool on) {
  unsigned char command[5];
  command[0] = 0x50 + (accyAddr >> 7);
  command[1] = accyAddr & 0x7f;
  command[2] = on?4:3;
  command[3] = 0;
  command[4] = ((command[0] ^ command[1]) ^ command[2]) ^ command[3];
  cbSend(command, 5);
}

void cbSend(unsigned char buf[], int len) {
  unsigned char rxByte;
  unsigned long timeout;
  // Empty input buffer
  while (RS485.available()) {
    rxByte = RS485.read();
  }
  timeout = millis() + 250;
  rxByte = RS485.read();
  // Swallow input until our address is polled
  while (rxByte != 0x80 + controllerAddress) {
    if (millis() > timeout) {
      // Cab Bus is probably disconnected
      return;
    }
    rxByte = RS485.read();
  }
  // Respond 100..800 µs after poll
  delayMicroseconds(150);
  // Send command
  digitalWrite(txEnablePin, HIGH);
  RS485.write(buf, len);
  RS485.flush();
  digitalWrite(txEnablePin, LOW);
}

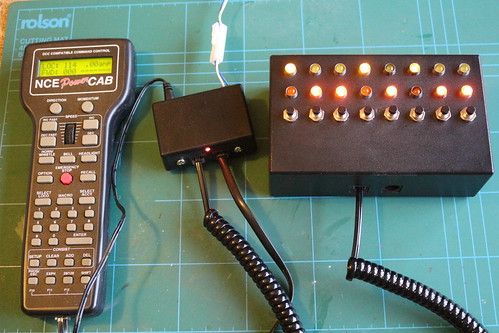
Here is the controller connected up to my PowerCab.

Arduino CabBus controller

Monday, 11 November 2019

Chromatic aberration in digital photographs

In my last post I wrote about my attempts to measure vignetting in the lenses I use with my DSLR camera. Another lens problem that the camera can correct (but only for Canon lenses) is lateral chromatic aberration.

To determine the amount of correction my lenses need I printed out a simple test chart and photographed it at a variety of focal lengths. I also tried different apertures, but the correction required does not vary with aperture. Here is one of my photographs.

Chromatic aberration tests

I tried to write some software to measure any disparity between red, green, and blue images, but failed to achieve anything usable. I settled for judging the error by eye using this simple Pyctools network.


The "reader" component has options to scale the red and blue images to minimise chromatic aberration. By adjusting the scale values and then re-running the graph I was able to find good values for each of my lenses, at several focal lengths for the zoom lenses. The "UVgain" stage makes it easier to see the aberration. Multiplying the U signal by zero and the V signal by 8 or 16 makes it much easier to tune the red scaling, and vice versa to tune the blue.

I've now reached the stage where I can process my "raw" camera images and get better looking results than from the camera's internal processing. I've combined all my chromatic aberration and vignetting measurements into an easy to use Python script. I expect to continue to improve it in future.

Tuesday, 22 October 2019

Digital photograph vignetting revisited

A few years ago I wrote about some experiments I'd done with measuring and correcting vignetting in digital photographs. (Some cameras have such correction built in, called "peripheral illumination correction" or similar.)

I recently purchased a second-hand 10-18 mm wide angle lens for my DSLR. Measuring its vignetting using my previous method is difficult as it has a field of view in excess of 100°. It's hard to provide an evenly illuminated target this large. The answer is to assume the lens has no vignetting at its smallest aperture, and use an image at this aperture as a reference when measuring the vignetting.

I set up the camera on my dining room table with an A4 sheet of translucent Perspex (or similar) an inch or so in front of the lens hood. The camera was facing towards the window, but no other lighting was used.

This is a photo taken at 10mm focal length and maximum aperture, ƒ/4.5.
Vignetting tests

At minimum aperture, ƒ/22, the result doesn't look much different, apart from a bit of fluff on the front of the lens being more nearly in focus.
Vignetting tests

Dividing the ƒ/4.5 image by the ƒ/22 (after converting both to luminance) gives this image.
Vignetting tests

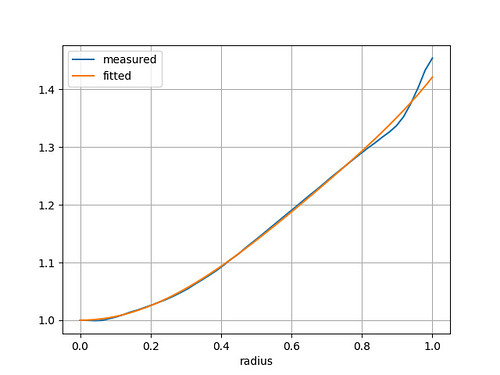
This may not appear to have much vignetting, but my analysis and curve fitting suggests otherwise.
Vignetting tests

The fitted function (shown in orange) is a polynomial in r², r⁴, and r⁶. Using even powers of r ensures the function has zero slope at r=0. The correction required is about half an ƒ-stop (factor of 1.41) at the corners.

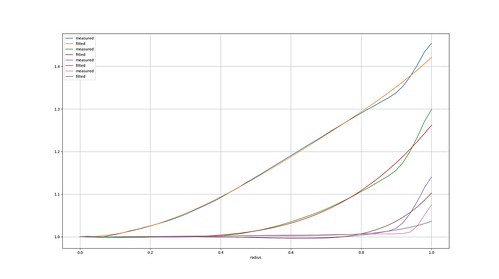
Running the process for narrower apertures shows the expected reduction in vignetting.
Vignetting tests

I think the  "measured" curves show some similarity, but a 3rd order polynomial (in r²) is not a good match at smaller apertures. There's also no obvious trend in the polynomial coefficients, so I can't confidently predict the correction required at other apertures. I'd like to find a better fitting function, but I think this is beyond my mathematical abilities.

PS I've just tried fitting a power function 1.0 + (a * (x ** b)) instead of a polynomial and instantly got better looking results.
Vignetting tests

Wednesday, 11 September 2019

Shaun the Sheep

I'm a huge fan of the Aardman Animation children's TV series "Shaun the Sheep". Although it's nominally a children's programme there is a lot in it for adults as well. I particularly like the references to things that not many children would be aware of. Here are a few that I've spotted. I'll add more when I find them.

All images ©Aardman / BBC / WDR.

"Supersize Timmy" (S2, E09)

This episode borrows a lot from "King Kong".


"Let's Spray" (S3, E05)

Timmy's graffiti looks like a "Banksy" to me. (Note - this episode is not broadcast in the UK as it might encourage vandalism. The still is from German TV.)


"Hard To Swallow" (S3, E08)

A birdwatcher points his binoculars at a pair of crows. One of them turns and grins in a way that reminds me of Eric Morecambe.


"Missing Piece" (S4, E14)

The jigsaw is a bit like Constable's "The Hay Wain".  Or maybe not. Please yourselves.


"Turf Wars" (S5, E11)

This episode climaxes with a lovely homage to Eisenstein's "Battleship Potemkin".


"Happy Farmers' Day" (S5, E16)

The sheep cook a meal for the farmer, but various mishaps delay the dessert. Bitzer provides some entertainment, perhaps inspired by Manuel and Polly in "Fawlty Towers".


Thursday, 24 May 2018

Setting up a Raspberry Pi Zero W to run pywws

I recently bought my first Raspberry Pi Zero W, a tiny little computer just 3 inches long and 1½ inches wide (in its case). I intend eventually to get it working with pywws (some weather station software I wrote a while ago) and I'll be adding to this blog post as I go along, to keep it all in one place.

Getting started


As I'll be using the Pi in "headless" mode (no monitor or keyboard in normal operation) I decided to start as I mean to go on. This also means I don't yet need adapters for the mini HDMI and OTG USB ports on the Pi Zero.

I downloaded and copied the current version of Raspbian, called "stretch", and copied it to a 16 GB micro SD card. An 8 GB card would have been sufficient but the larger card only cost a few pence extra. Note that this is the full version of Raspbian (i.e. not "lite") and is not the NOOBS version.

Booting the Pi directly into headless mode turned out to be surprisingly easy. The instructions in this forum post were all I needed, and worked perfectly despite the negative comments on the post. I inserted the micro SD card, in an adapter, into my openSUSE Linux PC and used the "open with file manager" prompt to mount both partitions. The df command showed them to be mounted as /run/media/jim/boot and /run/media/jim/rootfs.

Having changed directory to the /run/media/jim/boot partition all I had to do was create an empty file called ssh (with the command sudo touch ssh) then use a text editor (run via sudo) to create a file wpa_supplicant.conf with the following contents:
country=GB
ctrl_interface=DIR=/var/run/wpa_supplicant GROUP=netdev
update_config=1

network={
    ssid="my_wifi_ssid"
    scan_ssid=1
    psk="my_wifi_password"
    key_mgmt=WPA-PSK
}

After safely unmounting the SD card partitions I removed it from the PC, put it in the Pi, and turned the power on. About a minute later the hostname raspberrypi showed up in the DHCP server's list of hosts and I was able to ssh into it (the initial password is raspberry):
jim@brains:~$ ssh pi@raspberrypi
The authenticity of host 'raspberrypi (192.168.1.176)' can't be established.
ECDSA key fingerprint is SHA256:bw10eHPZ3debE04S+5a8xEYSDHT9AmZk8MJWxfNTapQ.
Are you sure you want to continue connecting (yes/no)? yes
Warning: Permanently added 'raspberrypi,192.168.1.176' (ECDSA) to the list of known hosts.
pi@raspberrypi's password: 
Linux raspberrypi 4.14.34+ #1110 Mon Apr 16 14:51:42 BST 2018 armv6l

The programs included with the Debian GNU/Linux system are free software;
the exact distribution terms for each program are described in the
individual files in /usr/share/doc/*/copyright.

Debian GNU/Linux comes with ABSOLUTELY NO WARRANTY, to the extent
permitted by applicable law.
Last login: Wed Apr 18 01:25:27 2018

SSH is enabled and the default password for the 'pi' user has not been changed.
This is a security risk - please login as the 'pi' user and type 'passwd' to set a new password.

pi@raspberrypi:~ $ passwd
Changing password for pi.
(current) UNIX password: 
Enter new UNIX password: 
Retype new UNIX password: 
passwd: password updated successfully
pi@raspberrypi:~ $

Creating a user


I could continue to use the default pi user name, but I find it more convenient to have the same user name on all my computers. As I'll be using NFS to share storage with some of those computers it's also useful if the user has the same UID number:
pi@raspberrypi:~ $ sudo adduser --uid 1026 jim
Adding user `jim' ...
Adding new group `jim' (1026) ...
Adding new user `jim' (1026) with group `jim' ...
Creating home directory `/home/jim' ...
Copying files from `/etc/skel' ...
Enter new UNIX password: 
Retype new UNIX password: 
passwd: password updated successfully
Changing the user information for jim
Enter the new value, or press ENTER for the default
        Full Name []: Jim Easterbrook
        Room Number []: 
        Work Phone []: 
        Home Phone []: 
        Other []: 
Is the information correct? [Y/n] y
pi@raspberrypi:~ $ sudo visudo -f /etc/sudoers.d/010_pi-nopasswd
pi@raspberrypi:~ $
The final visudo command is to add the new user to the list of users permitted to do things as root.

Logging in without a password


It may sound strange but this is a way to improve security when using ssh. Passwords can perhaps be guessed, but a 2048 bit RSA key is harder to crack. I already have a key, so I just needed to copy the public key to my new account on the Pi:
jim@brains:~$ ssh-copy-id -i ~/.ssh/id_rsa.pub raspberrypi
/usr/bin/ssh-copy-id: INFO: Source of key(s) to be installed: "/home/jim/.ssh/id_rsa.pub"
/usr/bin/ssh-copy-id: INFO: attempting to log in with the new key(s), to filter out any that are already installed
/usr/bin/ssh-copy-id: INFO: 1 key(s) remain to be installed -- if you are prompted now it is to install the new keys
jim@raspberrypi's password: 

Number of key(s) added: 1

Now try logging into the machine, with:   "ssh 'raspberrypi'"
and check to make sure that only the key(s) you wanted were added.

jim@brains:~$ ssh raspberrypi
Linux raspberrypi 4.14.34+ #1110 Mon Apr 16 14:51:42 BST 2018 armv6l

The programs included with the Debian GNU/Linux system are free software;
the exact distribution terms for each program are described in the
individual files in /usr/share/doc/*/copyright.

Debian GNU/Linux comes with ABSOLUTELY NO WARRANTY, to the extent
permitted by applicable law.
Last login: Fri May 25 07:13:41 2018 from 192.168.1.162
jim@raspberrypi:~ $
No password was needed to login to the Pi, as expected.

The next step is to disable ssh with passwords entirely. Edit the sshd_config file and restart the ssh daemon:
jim@raspberrypi: $ sudo vi /etc/ssh/sshd_config 
jim@raspberrypi: $ sudo service ssh restart
There is just one line to edit, to disable password logins uncomment the PasswordAuthentication line and set it to no:
# To disable tunneled clear text passwords, change to no here!
PasswordAuthentication no
#PermitEmptyPasswords no
Test by attempting to login as another user:
jim@brains:~$ ssh pi@raspberrypi
Permission denied (publickey).
jim@brains:~$

Completing initial setup


I used sudo raspi-config to set the host name (under network options), set the locale (en_GB.UTF-8) and timezone (Europe/London) under localisation options, and set it to boot to console rather than desktop (under boot options).

To minimise SD card "wear" I moved some directories to RAM by adding the following to /etc/fstab and then rebooting:
tmpfs  /tmp      tmpfs  defaults,noatime,nosuid,size=100m  0 0
tmpfs  /var/log  tmpfs  defaults,noatime,nosuid,mode=0755,size=100m  0 0
tmpfs  /run      tmpfs  defaults,noatime,nosuid,mode=0755,size=2m  0 0
(At first the Pi failed to boot, so I moved the SD card to my main PC, mounted rootfs and deleted everything in the directories that have been moved to tmpfs.)

I also disabled swap (with sudo apt-get remove dphys-swapfile) and turned off file system journaling.

I added a few of my favourite command aliases by creating a file /etc/profile.d/aliases.sh containing the following:
alias df='df -h'
alias la='ls -ao'
alias ll='ls -l'

To save a small amount of power consumption I turned off video output by adding the following to /etc/rc.local, before the exit 0 line:
# turn off video output signal
/usr/bin/tvservice -off

File sharing with NFS


It's very convenient to be able to copy files from one machine to another with NFS. The autofs service can be used to mount NFS shares when needed. I started by exporting the Pi's /home file system so it can be mounted on other machines. This requires installing the NFS server package:
jim@gordon:~ $ sudo apt-get -o Acquire::ForceIPv4=true update
jim@gordon:~ $ sudo apt-get -o Acquire::ForceIPv4=true install nfs-kernel-server
The -o Acquire::ForceIPv4=true option stops apt-get using IPv6, as I don't yet have an IPv6 internet connection.

I then added the following line to /etc/exports:
/home   192.168.1.0/24(rw,root_squash,sync,no_subtree_check)
This should allow any machine on my local network to read and write files in /home on the Pi, once the NFS server is restarted:
sudo service nfs-kernel-server restart

To mount other machines on the Pi requires autofs to be installed:
jim@gordon:~ $ sudo apt-get -o Acquire::ForceIPv4=true install autofs
I then edited /etc/auto.master and added the following line:
/auto   /etc/auto.tracy.island  --timeout=30
The file /etc/auto.tracy.island lists the NFS shares I want access to:
brains  -bg,intr                brains:/home
zero-x  -fstype=nfs4,bg,intr    zero-x:/volume1
brains is my main PC and zero-x is my Synology NAS box. (Fans of 1960s children's television should know what inspired my local network naming scheme.)

After restarting autofs I can access files on other machines:
jim@gordon:~ $ sudo service autofs restart
jim@gordon:~ $ ll /auto/brains/
total 32
drwxr-xr-x  7 1024 users  4096 May 19 09:42 admin
drwxr-xr-x 94 jim  users  4096 May 25 11:18 jim
drwx------  2 root root  16384 Aug 21  2011 lost+found
drwxr-xr-x 13 2001 users  4096 May 22  2016 sarah
drwxr-xr-x 19 pi   users  4096 Sep  9  2017 test
jim@gordon:~ $ ll /auto/zero-x
total 208
drwxrwxrwx 113 root root   4096 Mar  6 18:15 audio
drwxrwxrwx   6 root root   4096 May 18 15:12 brains
drwxrwxrwx   5 root root   4096 May 10 12:19 DVD
drwxrwxrwx   6 root root   4096 May 10 14:22 firefly
drwxrwxrwx   6 root root   4096 May  9 08:59 kyrano
drwxrwxrwx  29 root root   4096 May 15 14:07 photos
drwxrwxrwx   7 root root 131072 May 17 12:59 pvr
drwxrwxrwx   5 root root  12288 May 12 08:41 toppy
drwxrwxrwx  11 root root   4096 May 20 09:45 video
jim@gordon:~ $

Scheduling backup


Experience has taught me the value of backing up computers. The Raspberry Pi is no exception, and as I have a NAS that's always on backing up couldn't be easier. I created a "scripts" directory and added two files. /home/jim/scripts/backup_to_zero-x.sh does the actual backup:
#!/bin/sh

log=/var/log/log-backup

dest="jim@zero-x::gordon"
export RSYNC_PASSWORD=xxxxxx

rsync -av \
        /etc $dest >$log 2>&1
rsync -av \
        --exclude=".cache" \
        --exclude="cache" \
        /home $dest >>$log 2>&1

# mail the log file
if [ -s $log ]; then
  /home/jim/scripts/email-log.py $log "backup log"
  fi
/home/jim/scripts/email-log.py emails the backup log to an email server running on the NAS:
#!/usr/bin/env python

from email.utils import formatdate
import platform
from smtplib import SMTP
import sys

def main():
    file = sys.argv[1]
    subject = sys.argv[2]
    with open(file, 'r') as f:
        contents = f.read()
    if not contents:
        return
    sender = platform.node() + '@tracy.island'
    date = formatdate()
    msg = '''Subject: {subject}
From: {sender}
Date: {date}

{file} contents follows
===START===
'''.format(date=date, file=file, sender=sender, subject=subject)
    msg += contents
    msg += '''
====END====
'''
    smtp = SMTP(host='zero-x', port=25, timeout=20)
    smtp.sendmail(sender, 'jim@zero-x.tracy.island', msg)

if __name__ == '__main__':
    main()
I set up a root user "cron" job to run the backup script daily at around 4 am.

Installation of pywws


You'll probably want to install pywws from PyPI, but I use the development version from GitHub:
jim@gordon:~ $ mkdir weather
jim@gordon:~ $ cd weather/
jim@gordon:~/weather $ git clone https://github.com/jim-easterbrook/pywws.git
Cloning into 'pywws'...
remote: Counting objects: 9190, done.
remote: Compressing objects: 100% (24/24), done.
remote: Total 9190 (delta 10), reused 15 (delta 4), pack-reused 9162
Receiving objects: 100% (9190/9190), 4.55 MiB | 724.00 KiB/s, done.
Resolving deltas: 100% (5557/5557), done.
jim@gordon:~/weather $ cd pywws
jim@gordon:~/weather/pywws $ python3 setup.py build
...
jim@gordon:~/weather/pywws $ sudo python3 setup.py install
...
jim@gordon:~/weather/pywws $
The install process was hanging whilst fetching dependencies from https://pypi.python.org/ until I disabled IPv6 entirely by adding net.ipv6.conf.all.disable_ipv6 = 1 to /etc/sysctl.conf and rebooting.

The next step is to install the required Python USB library:
jim@gordon:~/weather/pywws $ sudo apt-get install python3-libusb1
Reading package lists... Done
Building dependency tree       
Reading state information... Done
The following NEW packages will be installed:
  python3-libusb1
0 upgraded, 1 newly installed, 0 to remove and 38 not upgraded.
Need to get 35.1 kB of archives.
After this operation, 189 kB of additional disk space will be used.
Get:1 http://raspbian.mirror.uk.sargasso.net/raspbian stretch/main armhf python3-libusb1 all 1.6.3-1 [35.1 kB]
Fetched 35.1 kB in 0s (67.1 kB/s)    
Selecting previously unselected package python3-libusb1.
(Reading database ... 124808 files and directories currently installed.)
Preparing to unpack .../python3-libusb1_1.6.3-1_all.deb ...
Unpacking python3-libusb1 (1.6.3-1) ...
Setting up python3-libusb1 (1.6.3-1) ...
jim@gordon:~/weather/pywws $
Finally I can test that the core pywws software is installed correctly:
jim@gordon:~/weather/pywws $ pywws-version -v
18.5.0
build: 1541
commit: d505b50
Python: 3.5.3 (default, Jan 19 2017, 14:11:04) 
[GCC 6.3.0 20170124]
USB:    pywws.device_libusb1
examples:
   /usr/local/lib/python3.5/dist-packages/pywws-18.5.0-py3.5.egg/pywws/examples
docs:
   http://jim-easterbrook.github.com/pywws/
jim@gordon:~/weather/pywws $ pywws-testweatherstation 
12:29:22:pywws.logger:pywws version 18.5.0, build 1541 (d505b50)
Traceback (most recent call last):
  File "/usr/local/bin/pywws-testweatherstation", line 11, in 
    load_entry_point('pywws==18.5.0', 'console_scripts', 'pywws-testweatherstation')()
  File "/usr/local/lib/python3.5/dist-packages/pywws-18.5.0-py3.5.egg/pywws/testweatherstation.py", line 117, in main
    ws = pywws.weatherstation.WeatherStation()
  File "/usr/local/lib/python3.5/dist-packages/pywws-18.5.0-py3.5.egg/pywws/weatherstation.py", line 462, in __init__
    self.cusb = CUSBDrive()
  File "/usr/local/lib/python3.5/dist-packages/pywws-18.5.0-py3.5.egg/pywws/weatherstation.py", line 316, in __init__
    self.dev = USBDevice(0x1941, 0x8021)
  File "/usr/local/lib/python3.5/dist-packages/pywws-18.5.0-py3.5.egg/pywws/device_libusb1.py", line 78, in __init__
    raise IOError("Weather station device not found")
OSError: Weather station device not found
jim@gordon:~/weather/pywws $

Connecting the weather station


Given the limitations of the "OTG" USB port on the Pi Zero I was pleasantly surprised that when I connected my test weather station console (an old one whose outside sensors have failed) via a standard USB A to micro USB lead (as used to connect a phone to a computer) it powered up normally. It also works with pywws:
jim@gordon:~/weather/pywws $ sudo pywws-testweatherstation 
12:32:56:pywws.logger:pywws version 18.5.0, build 1541 (d505b50)
0000 55 aa ff ff ff ff ff ff ff ff ff ff ff ff ff ff 03 20 01 41 11 00 00 00 81 7f 00 01 00 00 00 01 
0020 94 27 87 27 00 00 00 00 00 00 00 07 01 01 16 55 41 23 c8 00 00 00 46 2d 2c 01 64 80 c8 00 00 00 
0040 64 00 64 80 a0 28 80 25 a0 28 80 25 03 36 00 05 6b 00 00 0a 00 f4 01 12 00 00 00 00 00 00 00 00 
0060 00 00 5a 0a 63 0a 41 01 56 00 dc 01 08 81 dc 01 c5 81 68 01 75 81 95 28 d3 25 24 29 5a 25 fd 02 
0080 04 03 f4 ff fd ff 85 ff 91 ff 6c 09 00 14 10 19 06 29 12 02 01 19 32 11 09 09 05 18 12 03 28 13 
00a0 00 13 07 19 18 28 07 01 01 12 00 13 09 24 13 02 13 09 24 13 33 13 09 24 13 02 12 07 28 12 50 13 
00c0 09 24 13 02 13 10 14 16 18 12 02 07 19 00 16 03 28 04 45 13 01 04 10 28 15 01 30 05 22 12 03 10 
00e0 22 02 07 01 02 00 02 12 07 28 11 59 13 03 06 06 43 12 04 13 00 04 12 04 13 00 04 12 07 31 03 34 
jim@gordon:~/weather/pywws $
I used sudo as the USB device is "owned" by root by default.

The USB ownership is best dealt with by adding a "udev" rule. Create a file /etc/udev/rules.d/39-weather-station.rules containing the following:
ACTION!="add|change", GOTO="weatherstation_end"
SUBSYSTEM=="usb", ATTRS{idVendor}=="1941", ATTRS{idProduct}=="8021", OWNER="jim"
LABEL="weatherstation_end"
(Replace jim with your user name.)

Restart the udev system (sudo service udev restart) and unplug then replug the weather station. You should now have access to the weather station without using sudo:
jim@gordon:~/weather/pywws $ ll /dev/bus/usb/001/
total 0
crw-rw-r-- 1 root root 189, 0 May 25 12:20 001
crw-rw-r-- 1 jim  root 189, 2 May 25 13:03 003
jim@gordon:~/weather/pywws $ pywws-testweatherstation 
13:04:14:pywws.logger:pywws version 18.5.0, build 1541 (d505b50)
0000 55 aa ff ff ff ff ff ff ff ff ff ff ff ff ff ff 03 20 01 41 11 00 00 00 81 7f 00 01 00 00 00 01 
0020 94 27 88 27 00 00 00 00 00 00 00 07 01 01 12 31 41 23 c8 00 00 00 46 2d 2c 01 64 80 c8 00 00 00 
0040 64 00 64 80 a0 28 80 25 a0 28 80 25 03 36 00 05 6b 00 00 0a 00 f4 01 12 00 00 00 00 00 00 00 00 
0060 00 00 5a 0a 63 0a 41 01 56 00 dc 01 08 81 dc 01 c5 81 68 01 75 81 95 28 d3 25 24 29 5a 25 fd 02 
0080 04 03 f4 ff fd ff 85 ff 91 ff 6c 09 00 14 10 19 06 29 12 02 01 19 32 11 09 09 05 18 12 03 28 13 
00a0 00 13 07 19 18 28 07 01 01 12 00 13 09 24 13 02 13 09 24 13 33 13 09 24 13 02 12 07 28 12 50 13 
00c0 09 24 13 02 13 10 14 16 18 12 02 07 19 00 16 03 28 04 45 13 01 04 10 28 15 01 30 05 22 12 03 10 
00e0 22 02 07 01 02 00 02 12 07 28 11 59 13 03 06 06 43 12 04 13 00 04 12 04 13 00 04 12 07 31 03 34 
jim@gordon:~/weather/pywws $
As soon as I tried "live" logging, with the command pywws-testweatherstation -l -vv, I got USB timeout errors as reported by other pywws users on the pywws mail list.

A bit of experimenting with longer timeouts and measuring times to read data from the station showed the problem only occurs after pywws has paused USB activity for 5 seconds or more. I had a hunch the the Pi might be switching USB modes during this apparent inactivity, so I added the line dtoverlay=dwc2,dr_mode=host to /boot/config.txt to fix the USB port in "host" mode. This appears to have cured the timeout problem.

Final steps


To finish off I installed all the pywws dependencies I need, then copied the pywws data directory from the Pi 2 I was using. That machine has a disc drive so I haven't had to worry about SD card wear. I made a few changes to weather.ini to minimise writes to the card:
[config]
frequent writes = False

[paths]
local_files = /tmp/pywws/results
work = /tmp/pywws
I'm also using /tmp/pywws for the logfile. This avoids writing to the SD card, but does mean that the log is cleared every time the Pi is rebooted. I don't expect to have to do this too often.

The Raspberry Pi Zero is so small I'm tempted to stick it on the back of the weather station console, with a short USB lead (with right angle plugs?) to make a neat installation. However I suspect the wi-fi may interfere with the station's reception of data from the outside sensors.

Oxbridge entrance - a modest proposal

There has been some talk recently about apparent bias in the way Oxford and Cambridge universities select undergraduate students, disproportionately favouring (white) students from fee-paying schools. The universities respond, with some justification, that they accept anyone who gets top grades at A level and performs well at interview, and it's not their fault if state schools are failing to educate pupils to the required standard. (This is a gross oversimplification of the argument, but you get the idea.)

When I went to Cambridge (in the late 1970s) about half the undergraduates were, like me, from state schools. The good news is that this has improved to around 62%. The bad news is that this is still not enough. To be at the forefront of academic research the leading universities need to attract the best minds from whatever background. It is unlikely that they're to be found in such high proportions in fee-paying schools, which only educate about 6.5% of Britain's children.

The big question is how to remedy this imbalance. Almost any proposed change to the admission system still allows fee-paying schools to gain an advantage. Their higher number of teachers per pupil means they can provide intensive coaching that helps students get better A level results than they would in a state school. The supreme self-confidence they instil in many pupils is a great advantage at interview. The extra-curricular activities, from music to sport to mountain climbing, look good on the UCAS form and are in decline in many cash-strapped state schools. I think it's time for something more radical.

There are roughly 4 million people aged 15-19 in the UK at present, so there are about 800,000 reaching university age every year. Oxford University has around 3,200 undergraduate places each year, so one might expect one in 250 people to go to Oxford, or say 1 in 300 to allow a margin for foreign students. A 1000 pupil secondary school has around 150 students in each year, so might expect someone to get into Oxford every two years or so.

I propose that Oxford and/or Cambridge should allocate undergraduate places to schools based purely on the number of pupils aged 11-16 years at that school. For most schools the allocation would be a number less than one. The school would "bank" each year's allocation until they have more than 0.5 places at one university in the bank, and have a pupil who the school believes would benefit from going to that university. The bank account would then be debited one place, taking the balance below zero.

It would be up to the school to choose which pupil(s) to send, using any criteria they think appropriate. I'm sure most would take this responsibility seriously, but if St. Cakes (motto Quis paget entrat) decides to send the boy whose parents make the largest donation to the headmaster's drinks cabinet that's their business. I'm sure they'd welcome the ensuing publicity.

The side effects of this policy might be interesting. Would parents move to be near a "failing" school that has lots of places in the bank but no pupils capable of benefiting from a university education? The influx of children from homes with high expectations might do a lot to revive such "failing" schools. Would Eton form a multi-academy trust with lots of inner-city schools to boost its pupil numbers and so be allocated enough places for its fee-paying pupils? Probably, so the allocation rules will have to define a "school" as occupying buildings in close proximity.

Footnote: the state school I went to had 180 pupils in each year. I was the only one of my year group to go to Cambridge, and another of my year got in to Oxford. This was better than average for a state school and reflects the privileged upbringing of many of its pupils. I was lucky enough to be raised in a home full of books, where it was expected that I and my three siblings would go to university, with parents who willingly paid our maintenance costs, and who moved house to be in the catchment area of a good school. I benefited hugely from all these advantages, and it's wrong that people without such advantages are denied the benefits.

Saturday, 3 February 2018

Samyang 500mm ƒ/6.3 DX mirror lens

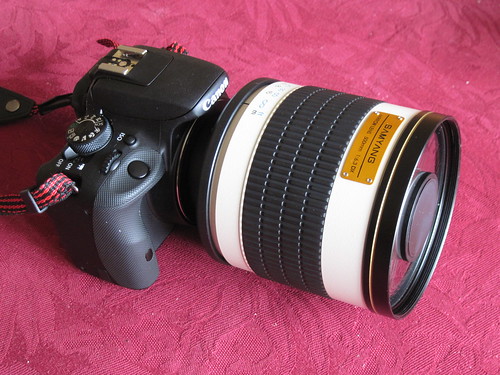
Long focal length lenses for SLR cameras are mostly one of two types - refractors (true lenses) or "mirror" lenses (actually Cassegrain telescopes). Large aperture long lenses are big, heavy, and expensive, but they can perform really well. Mirror lenses are much smaller, lighter, and usually a lot cheaper. However they are fixed aperture, usually manual focus, and have notable optical limitations.

500mm f/6.3 mirror lens

Three years ago I bought a Samyang 500mm ƒ/6.3 mirror lens. (What appears to be the same lens is sold under several other brand names. Mine is clearly labelled "made in Korea" though.) It was sold as "ex demo" but I can't see any sign it wasn't brand new. It comes with a screw-on lens hood not shown in the above photo. The lens has a T-thread (M42x0.75) mount, so I've used a T-thread to M42x1 adapter and an M42x1 to EOS adapter (which I already had) to attach it to my Canon 100D. The EOS adapter has a "focus chip" - this tells the camera it's got a Canon 50mm ƒ/1.8 lens attached and allows the focus confirm system to work on well lit subjects. ƒ/6.3 is about the smallest aperture the EOS 100D's focus system can cope with.

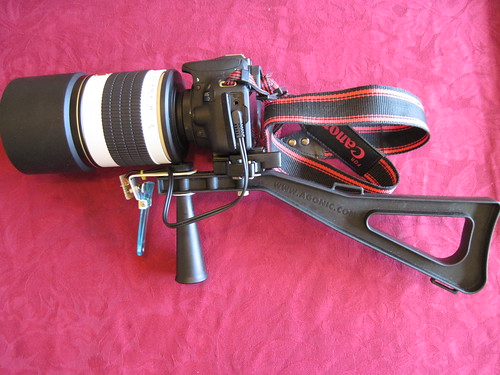
Stedi Stock camera shoulder brace

In another blog post I described how I've mounted the camera plus lens on a shoulder brace. I've recently been having some fun using this set up to photograph some birds in my garden. All the following pictures are taken through a double glazed window, which is sub optimal, so better pictures should be possible.

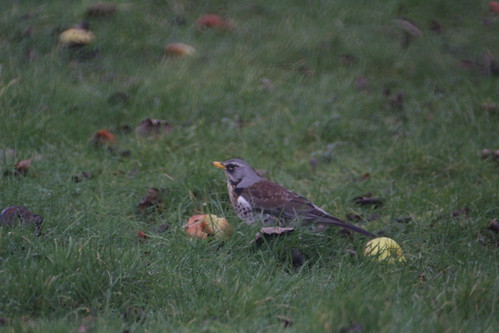
Fieldfare in my garden

This first picture is of a fieldfare (Turdus pilaris). This unprocessed picture is a bit dull, and if you zoom in (click on the picture to see it on Flickr, then click on it again to zoom in) you can see it's really not very sharp.

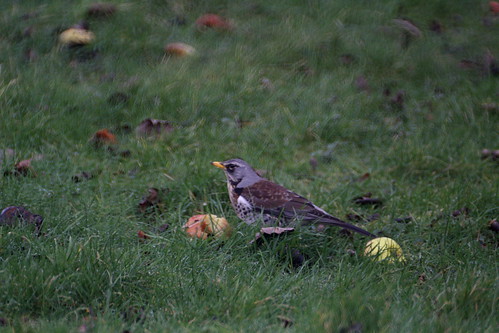
Fieldfare in my garden

I'm no expert in processing photographs but I thought I'd have a go using GIMP, an open source programme available on many operating systems. All I've done here is to boost the contrast a little, adjust the brightness, and use an "unsharp mask" filter to make it a bit less soft. I think it's a significant improvement.

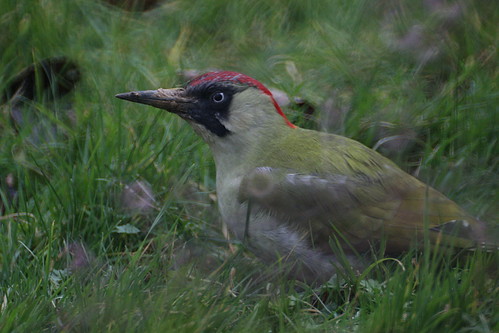
On this more recent picture (a green woodpecker (Picus viridis)) I actually managed to get the bird in focus. I've done similar processing and am pleased with the glint in the eye and the detail in the feathers.
Woodpecker in my garden

This picture also shows one of the optical defects of mirror lenses, the doughnut shapes formed around out of focus highlights. The ethereal ring shape in front of the bird's shoulder is caused by a berry on a plant stem in the foreground. Some people find this sort of aberration very annoying. I don't think I mind it too much.
The most severe problem with this particular lens design is the difficulty in focusing. Its focal distance goes from 2m to infinity (and beyond) in a quarter turn of the lens body. If they'd only made this nearer a full turn it would be much easier to use. Some people have remedied this by attaching long levers or gearing systems. I've yet to try anything like this.

Tuesday, 30 January 2018

Sussex pond pudding

Last weekend I made a Sussex pond pudding and, as I occasionally do, I posted a picture of it on Facebook. The ensuing discussion included both a request for my recipe and a link to a recent Guardian article "the perfect... Sussex pond pudding".

Here's my recipe, fleshed out with a few pictures. I've taken it from a slim booklet of traditional Sussex recipes I bought a few years ago in a branch of "Sussex Stationers", a now defunct budget bookshop chain.

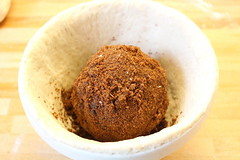
1/ Make suet pastry from 8 oz self raising flour, 4 oz suet, 2 oz breadcrumbs, pinch of salt, and enough water to make a soft dough. I use a food processor as I don't have the knack of making pastry by hand. The Guardian's recipe omits breadcrumbs, so won't have the brown flecks (from the crust) you can see in my picture.

Sussex pond pudding

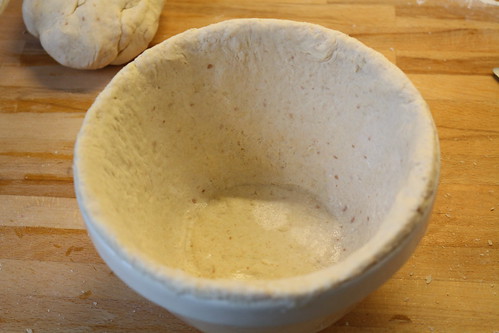
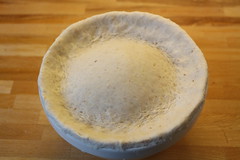
2/ Roll out the pastry and line a buttered 2 pint pudding bowl. To make a better fit to the steep sided bowl I cut out three triangles so the remainder is like a radiation warning symbol shape. I then join these cut edges (after dampening with water) inside the bowl. Trim around the top edge then combine all the pastry offcuts and roll out to make a circular lid.

Sussex pond pudding

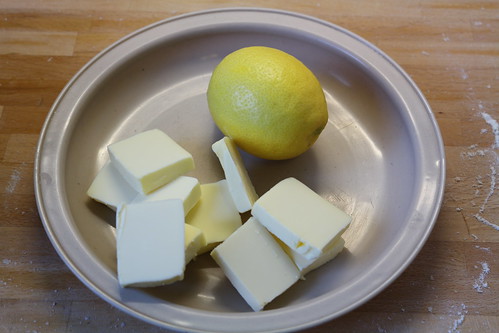
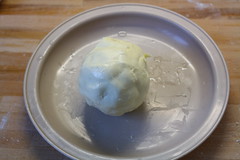
3/ Wash an unwaxed lemon and cut up 4 oz of butter and allow to soften. Stab the lemon many times with a skewer, then wrap in the butter, then roll in 4 oz of dark brown sugar. Place in the lined bowl with any left over sugar. The Guardian's version slashes the lemon with a knife and simply surrounds it with cubed butter and sugar which looks a lot easier.

Sussex pond pudding Sussex pond pudding

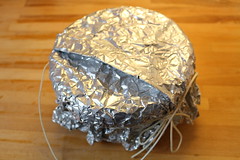
4/ Attach the lid and trim the edges, then cover with a circle of parchment and an aluminium foil lid with room for expansion. It domes right up as it cooks.

Sussex pond pudding Sussex pond pudding

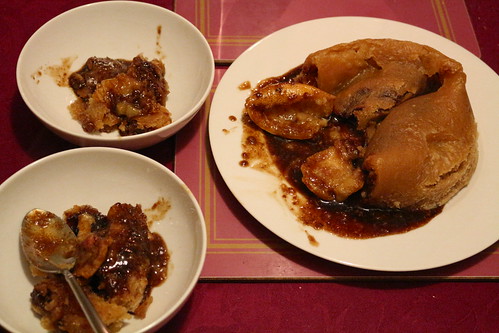
5/ Steam for 3 to 4 hours (or a bit more), turn out on to a plate and eat.

Sussex pond pudding

Tuesday, 21 November 2017

AstroMedia Copernican Orrery kit - part 2

In part 1 I described the first half (approximately) of the construction of a cardboard Orrery kit from AstroMedia. In the second half things get more interesting, and more complicated, as the majority of the pulleys and shafts are assembled.

AstroMedia Copernican Orrery kit

The first part to be constructed is the "planetary gearing". This will eventually roll around the ecliptic disc, held in place by drive bands above and below the ecliptic disc.

AstroMedia Copernican Orrery kit

As you know, Earth's rotational axis is tilted and the Orrery has quite a clever system to keep the axis pointing in (roughly) the same direction as the Earth orbits the sun. The Earth rotates on a steel shaft which runs through a brass tube attached to a small bracket. The bracket is attached to a hollow shaft that passes through the planetary gearing to a drive wheel below.

The Earth's rotation is driven by another pulley and shaft that passes through the planetary gearing. A round magnet attached to the top drives the Earth's rotation via a small piece of silicone tubing. Unfortunately I didn't get the magnet exactly centred on the shaft and so the drive occasionally slips.

AstroMedia Copernican Orrery kit

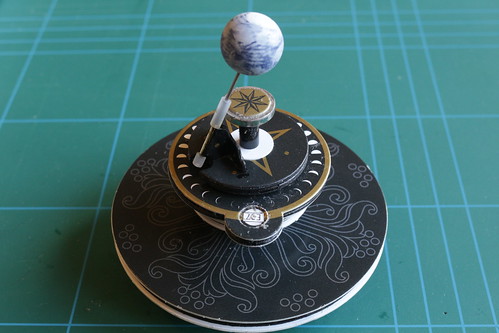
Above the ecliptic disc are two large discs supporting Mercury and Venus. The orbit of Venus is driven by a belt around its large support disc, and Mercury is driven from below by a hollow shaft through the Venus disc. After fitting all the drive belts the moon and remaining planets are attached with steel support pins.

AstroMedia Copernican Orrery kit

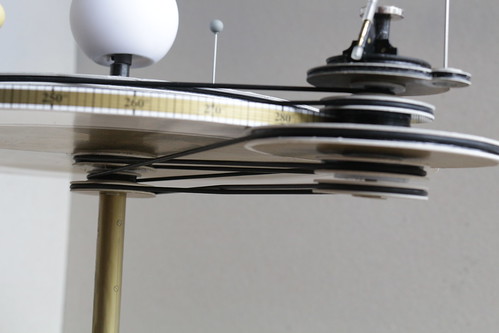
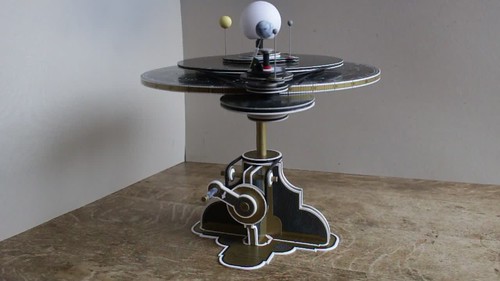
There are five drive belts holding the planetary gearing in place. The topmost one drives the orbit of Venus, the next drives Mercury's orbit. The bottommost one drives Earth's rotation, the next keeps Earth's axis pointing in a constant direction and the last drives the planetary gearing to roll around the ecliptic disc. Does it all work? Watch the video and see for yourself.

AstroMedia Copernican Orrery kit

PS More pictures of its construction are available on Flickr.

Tuesday, 14 November 2017

AstroMedia Copernican Orrery kit - part 1

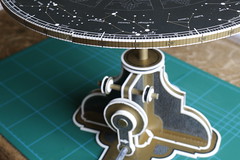
AstroMedia Copernican Orrery kit

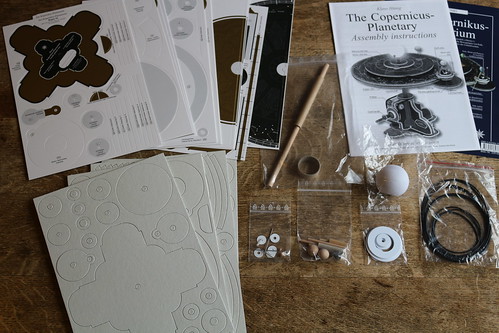
For a long time I've fancied having an Orrery but have been put off by the high price of traditional style brass ones with all the planets (and Pluto). Something much more my style is the cardboard kit from AstroMedia. This only has the inner planets, but I get the fun of building it.

I bought the kit a few months ago from Sherwoods Photographic Ltd, a company I've bought a telescope and accessories from in the past. Two weeks ago I finally got round to starting to construct it.

I soon discovered that one of the die-cut thick card sheets was missing (and I had a duplicate of another sheet). I emailed Sherwoods and they arranged for the UK arm of AstroMedia to send me a replacement, which arrived the next day. Top notch service from both companies.

At the time of writing I'm about halfway through building the kit. So far I'm very impressed with its quality, and with the instruction leaflet, although it occasionally reveals its German language origins. Construction is quite slow as you have to allow glue to set before moving on to the next stage. I'm also doing the optional painting of some cardboard edges on partly assembled components, so I have to wait for that paint to dry as well.

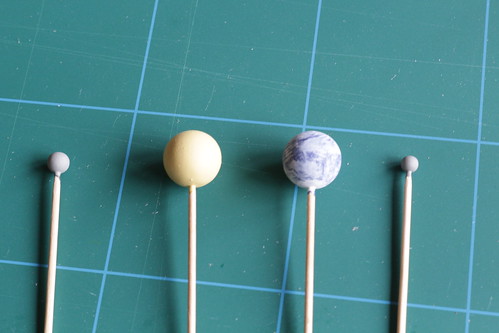
There is a temptation to read ahead and start constructing later parts, but with so many similar looking wheels it could get very confusing. One thing I have done in advance though is to paint the small wooden spheres used to represent the planets and our moon, after temporarily mounting them on cocktail sticks.

AstroMedia Copernican Orrery kit

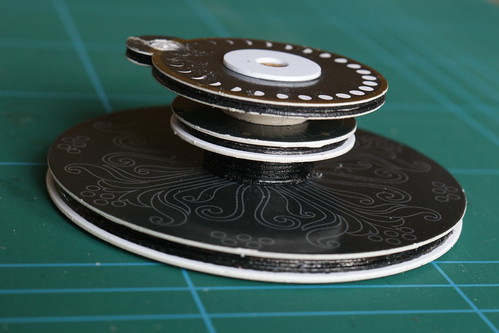
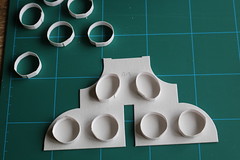
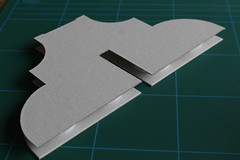
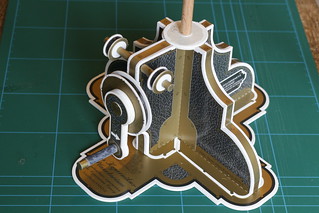
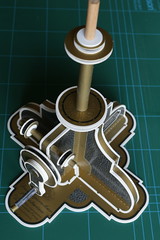
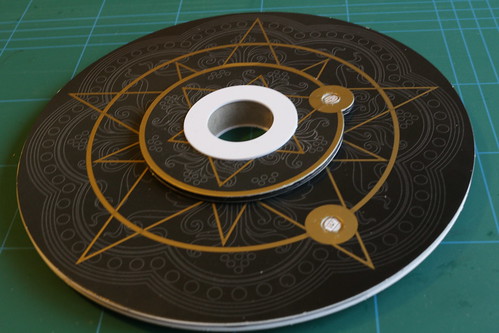
The first component to be built is the pedestal. This uses spacer rings between two sheets of card to make a strong, light structure. Strips of printed paper are used to cover the gap — a fiddly bit of glueing but the result isn't too bad.

AstroMedia Copernican Orrery kit AstroMedia Copernican Orrery kit AstroMedia Copernican Orrery kit AstroMedia Copernican Orrery kit

Next is the drive crank and pulleys, followed by the pedestal base and the central shaft with three pulleys.

AstroMedia Copernican Orrery kit AstroMedia Copernican Orrery kit

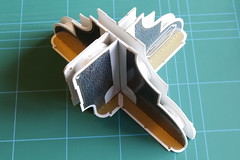
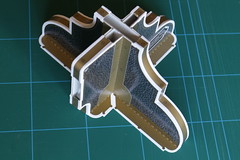
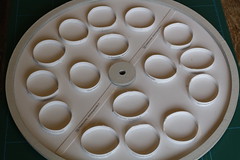
Today I finished the ecliptic disc, another structure using spacing rings. It's beginning to look like something now.

AstroMedia Copernican Orrery kit AstroMedia Copernican Orrery kit

PS Part two is now available. More pictures of its construction are available on Flickr.

Tuesday, 19 September 2017

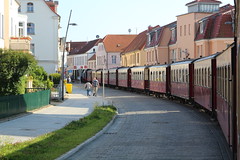
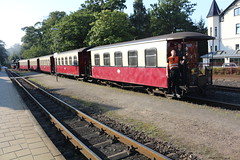
The "Molli-bahn" - a narrow gauge steam railway in north Germany

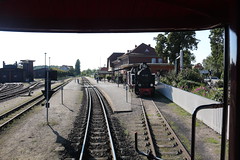
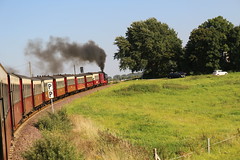
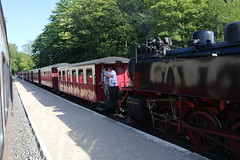
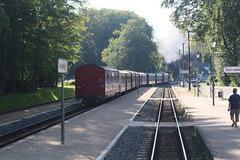
On our recent holiday in Germany Sarah and I stayed 3 nights in Bad Doberan and had a ride or two on the "Molli" bahn, a 900mm gauge railway that runs from Bad Doberan (where it connects with the main line) to Kühlungsborn on the Baltic coast. The first stage (Bad Doberan to Heiligendamm, 6.6km) dates from 1886, and the second stage (Heiligendamm to Kühlungsborn, 8.8km) from 1910. It's all single track, with passing at Heiligendamm station.

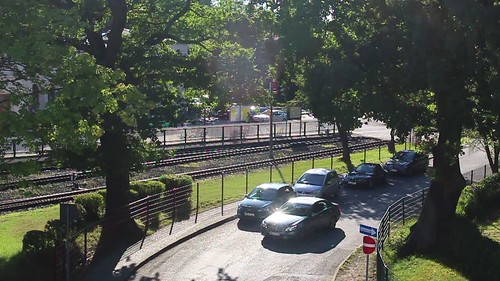
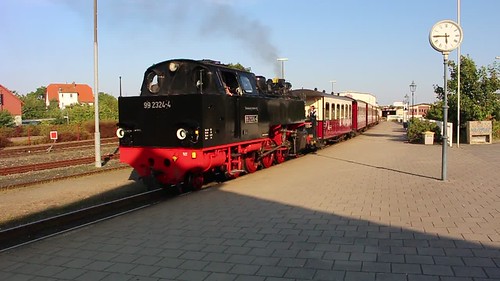
Our hotel was nice and close to the station. I recorded this video the afternoon of our arrival. Not a bad view from a hotel balcony! (Sarah was less impressed when we discovered that the first train in the morning arrives at 07:21, in similar noisy fashion.)
"Molli Bahn", Bad Doberan, Germany.

All these pictures and videos are hosted on Flickr, from where you can view or download them at full resolution.

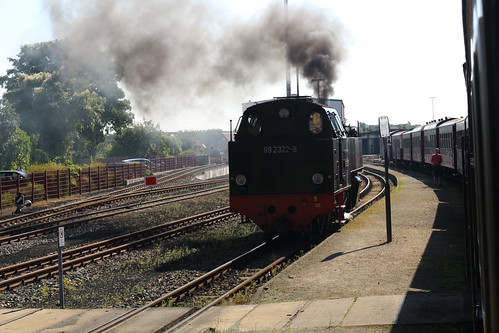
The next day we went by train to Kühlungsborn for a day at the seaside. The first pictures are of the loco being run around at Bad Doberan.
Bad Doberan to Kühlungsborn on the "Molli Bahn", Germany

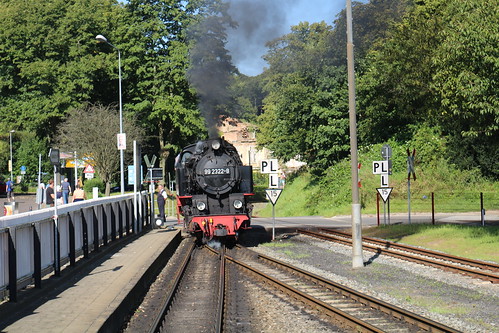
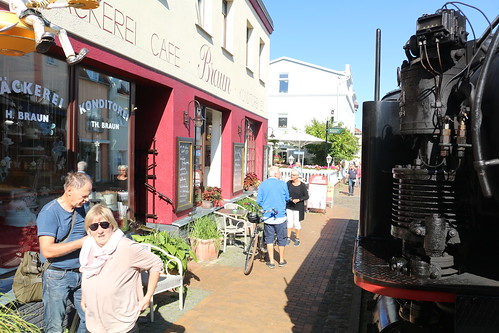
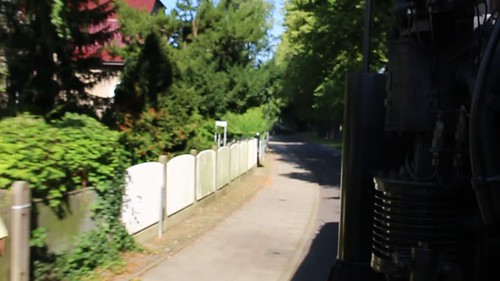
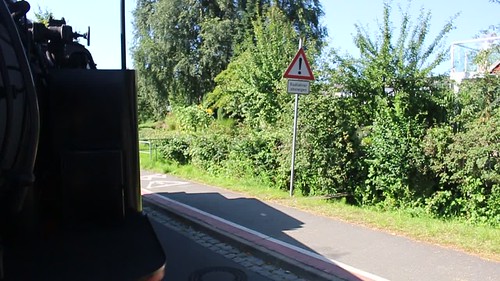
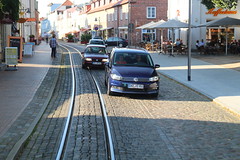
We got the best seats, right at the front of the train with a good view of the engine. One of the delights of the "Molli" is its street running in Bad Doberan (with continuous bell sounding).
Bad Doberan to Kühlungsborn on the "Molli Bahn", Germany

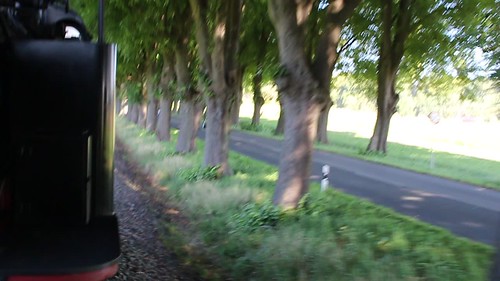
Once off the streets it can go a bit faster.
Bad Doberan to Kühlungsborn on the "Molli Bahn", Germany

I'm quite pleased with this video of it setting off from Kühlungsborn Mitte.
Bad Doberan to Kühlungsborn on the "Molli Bahn", Germany

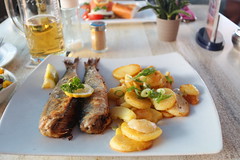
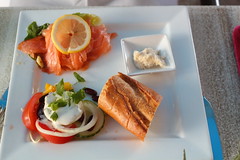
The beach at Kühlungsborn is long and sandy, and the sea is beautifully clear. We both had a swim and then had a lunch of fish and beer.
Kühlungsborn, Germany Kühlungsborn, Germany
Lunch in Kühlungsborn, Germany Lunch in Kühlungsborn, Germany

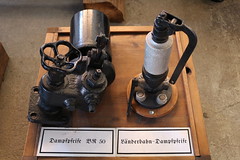
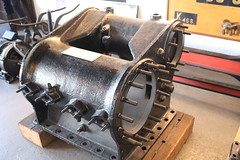
At Kühlungsborn West station there is a small museum.
"Molli" Museum, Kühlungsborn, Germany "Molli" Museum, Kühlungsborn, Germany

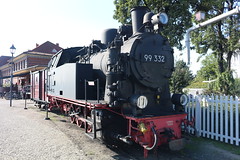
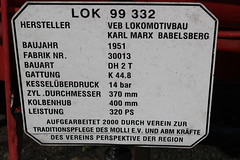
Among the exhibits is a 1951 loco. The ones in service date from 1932.
"Molli" Museum, Kühlungsborn, Germany "Molli" Museum, Kühlungsborn, Germany

For our return journey we got the best seats again, this time right at the back of the train.
Kühlungsborn to Bad Doberan on the "Molli Bahn", Germany Kühlungsborn to Bad Doberan on the "Molli Bahn", Germany

Passing at Heiligendamm.
Kühlungsborn to Bad Doberan on the "Molli Bahn", Germany Kühlungsborn to Bad Doberan on the "Molli Bahn", Germany

Street running in Bad Doberan.
Kühlungsborn to Bad Doberan on the "Molli Bahn", Germany Kühlungsborn to Bad Doberan on the "Molli Bahn", Germany

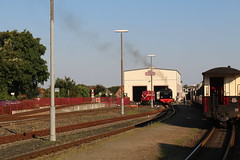
At Bad Doberan the last two trains of the day have 5 of the 10 carriages uncoupled and moved to a shed.
"Molli Bahn", Bad Doberan, Germany "Molli Bahn", Bad Doberan, Germany

The loco is then coupled to the remaining 5 carriages, plus saloon and luggage wagons, before leaving for Kühlungsborn where it spends the night.
"Molli Bahn", Bad Doberan, Germany